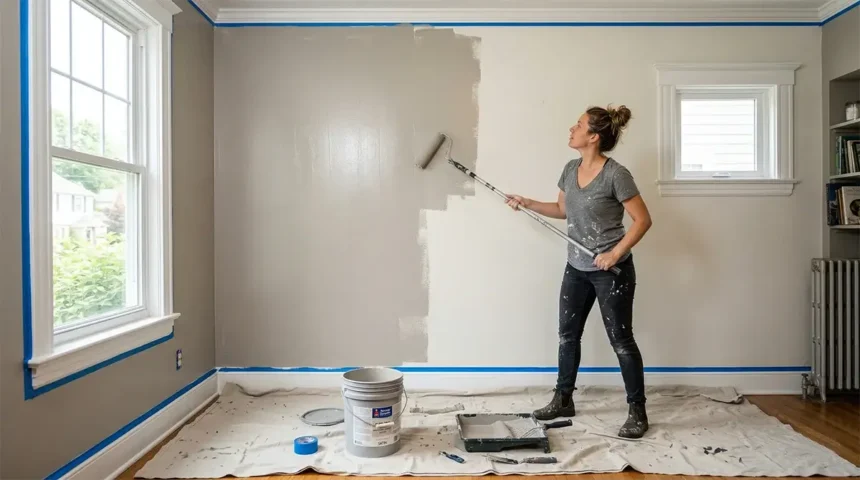
There is a significant gap between painting a wall and painting a wall well. The physical act of applying paint is easy. The preparation, sequencing, and technique that produce a clean, professional result — the kind where you cannot see lap marks, brush strokes at the edges, or uneven sheen — require specific knowledge that most how-to guides summarize in a paragraph. This guide does not.
Choosing the Right Paint and Materials
Paint Sheen — The Most Misunderstood Choice
The sheen level of your paint affects both the look and the durability of the finish. Americans consistently choose the wrong sheen level because the labels are unintuitive:
- Flat/Matte: Zero sheen. Hides imperfections best. Terrible durability — marks and scuffs easily and is difficult to clean. Best for: ceilings, low-traffic adult bedrooms.
- Eggshell: Slight sheen. Hides imperfections well. Significantly more washable than flat. Best for: living rooms, dining rooms, adult bedrooms. The most popular and most versatile finish for walls.
- Satin: Moderate sheen. Washable and moisture-resistant. Shows surface imperfections more than eggshell. Best for: kitchens, bathrooms, hallways, children’s rooms — anywhere that needs frequent cleaning.
- Semi-gloss: High sheen. Very durable and moisture-resistant. Shows every imperfection. Best for: trim, doors, and cabinetry — not walls (unless you specifically want the high-sheen look).
Paint Quality
Paint quality matters more than most DIYers realize. A cheap $20/gallon paint requires three coats to achieve what a quality $45/gallon paint achieves in two coats. When you factor in the extra labor, the cheap paint is not actually cheaper. Use mid-tier or premium paint — Sherwin-Williams SuperPaint, Benjamin Moore Regal Select, or Behr Marquee are the benchmark quality levels for DIY interior projects. Use the Sherwin-Williams paint calculator to estimate exactly how much paint your room requires before buying.
Materials List
- Paint (see quantity calculation below)
- Primer (if needed — see Priming section)
- 2.5-inch angled sash brush for cutting in
- 9-inch roller frame and roller covers (3/8 inch nap for smooth walls, 1/2 inch for textured)
- Extension pole for roller (makes rolling dramatically easier and more even)
- Painter’s tape (ScotchBlue Original or Frog Tape — quality matters here)
- Drop cloths (canvas, not plastic — canvas stays put and absorbs drips)
- Paint tray and liner
- Stir sticks
- Spackling compound and sandpaper for prep
- Damp rags and painter’s tool
The Preparation That Makes Everything Else Work
Professional painters spend more time preparing than painting. This is not an exaggeration — on a professional paint job, prep time and paint time are roughly equal. Skipping prep is the reason most DIY paint jobs look like DIY paint jobs.
Clean the Walls
Painted surfaces accumulate years of dust, grease, and grime that is invisible under existing paint but will cause adhesion problems under new paint. Wash all walls with a TSP (trisodium phosphate) substitute cleaner mixed with warm water and a large sponge. Pay extra attention to kitchen walls (grease splatter is invisible until paint won’t adhere over it) and areas around light switches (hand oils). Let walls dry completely — at least 24 hours.
Repair All Imperfections
Any nail holes, dents, or cracks in the wall will show under new paint — in fact, a fresh coat of paint in a different sheen will often make previously unnoticeable imperfections more visible. Fill every nail hole with spackling compound, let dry, and sand smooth. For cracks along trim or ceiling lines, use paintable caulk — apply a thin bead, tool it smooth with a wet finger, and let cure before painting.
Sand Glossy Surfaces
If you are painting over a glossy or semi-gloss surface, the new paint will not adhere properly without scuff-sanding. Lightly sand the existing glossy surface with 120-grit sandpaper to create mechanical adhesion. You are not trying to remove the existing paint — just dull the surface.
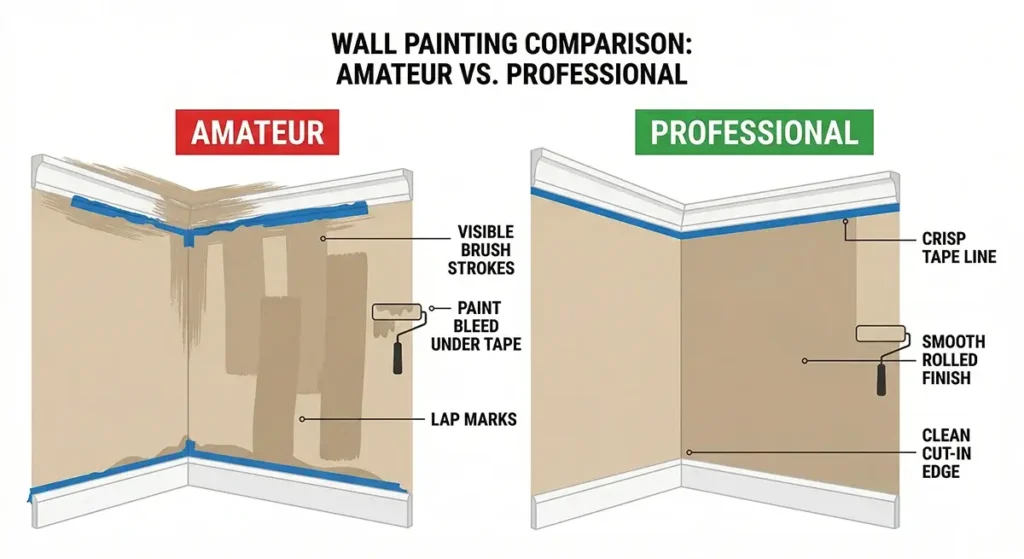
Tape Carefully
Painter’s tape applied correctly produces clean lines. Applied incorrectly it produces bleed-through that looks worse than no tape at all. Key technique: after applying the tape, run a putty knife or credit card firmly along the edge to fully seal the tape to the surface. This prevents paint from bleeding under the tape edge. Apply tape to trim, ceiling lines, and any surfaces you are not painting.
Protect Everything
Remove all outlet and switch covers. Remove curtain rods if possible. Move furniture to the center of the room and cover with drop cloths. Lay canvas drop cloths on the entire floor area. You will thank yourself when the inevitable drip happens.
Priming — When You Need It and When You Do Not
Primer is not always necessary, but there are situations where skipping it guarantees a poor result:
- Always prime: Over new drywall, over repaired areas (joint compound and spackling absorb paint differently than the surrounding wall), when making a dramatic color change (especially going from dark to light), and over stains or water damage marks.
- Usually prime: Over glossy surfaces, over previously painted surfaces in very poor condition, and when switching paint types (oil-based to latex).
- Can skip primer: When painting over a clean, properly prepared surface in a similar or darker color with quality self-priming paint. Paint-and-primer-in-one products have improved significantly and work well in these conditions.
Cutting In — The Skill That Separates Professional from Amateur Results
Cutting in means painting the edges, corners, and boundaries of the wall area with a brush before rolling the main field. It is the most technically demanding part of interior painting and the step that most visibly distinguishes a clean finish from a sloppy one.
The Correct Technique
- Load the brush correctly. Dip only the bottom third of the bristles into the paint. Tap (do not wipe) the brush lightly against the inside of the can to remove excess. A properly loaded brush holds enough paint to lay a smooth line without dripping.
- Cut in about 2 inches from the line first. Before painting right up to the tape or ceiling line, paint a stroke 2 inches away from the edge. This loads paint onto the wall and gives you a wet edge to work with.
- Move toward the line in a single stroke. With a loaded brush and the bristles at approximately 45 degrees to the surface, move toward the tape or ceiling line in a smooth, confident stroke. Let the very tip of the bristles touch the line — do not jam the full width of the brush into the corner.
- Work in sections of 2–3 feet. Maintain a wet edge. If you allow cut-in sections to dry before rolling over them, you will see the brush texture difference against the rolled texture even when both are the same color.
- Keep a damp rag nearby. For any line that wanders slightly, immediately wipe it back with a damp rag before it dries.
“The quality of a cut-in job is 80% confidence and 20% technique. A hesitant, tiptoeing brush stroke produces a wavy, uneven line. A smooth, committed stroke in one direction produces a clean line every time.”
Rolling Technique for a Lap-Mark-Free Finish
Lap marks — the slightly darker or textured lines that appear where roller passes overlap — are the most common DIY painting problem. They happen when you roll over paint that has already started to dry at its edges. Here is how to prevent them:
The W Method
- Load the roller fully by rolling it back and forth on the tray grid until the cover is evenly saturated. No drips, but also no dry patches.
- Apply paint to the wall in a large W or M pattern over a 3×3 foot section.
- Without reloading, fill in the W by rolling back and forth through the wet paint, connecting all strokes.
- Finish each section with light, full-length strokes from top to bottom to even out any texture variation.
- Move immediately to the adjacent section, slightly overlapping the wet edge of the first section.
Key Rolling Rules
- Always maintain a wet edge. Never let paint dry at a section boundary before covering it with the adjacent section. Work quickly enough to keep edges wet.
- Use an extension pole. Painting with a roller on a short handle forces you to work in small sections from varying distances and angles. A roller extension pole lets you stand back, work top-to-bottom in full wall-height strokes, and maintain consistent pressure.
- Do not press hard. Firm, even pressure — not hard pressure. Pressing too hard squeezes paint out from the ends of the roller, leaving marks.
- Roll in the same direction for the final strokes of each section. Random direction rolling produces an inconsistent texture that shows under raking light.
The Correct Sequence for an Entire Room
Painting a room in the correct order prevents you from ruining work you have already done:
- Ceiling first. Always. Drips from the ceiling onto finished walls mean repainting walls. Paint ceiling with a flat or matte ceiling paint.
- Walls second. Cut in all wall edges, then roll. If doing two coats, complete both coats on the walls before moving to trim.
- Trim and doors last. Trim is the most tedious part of the job and drips of trim paint onto freshly rolled walls are easy to clean while wet. Painting trim last means any overlap onto the wall gets covered when you do a final cut-in stroke where wall meets trim.
For evaluating which paint products deliver the best results for your specific project, Consumer Reports publishes annual ratings of interior paints based on independent testing of coverage, durability, and washability.
Cleanup and Finishing Touches
- Remove painter’s tape while the paint is still slightly wet — not fully dry and not fully wet. Remove it at a 45-degree angle, pulling back on itself. Removing tape after paint has fully dried can pull the new paint off the wall, especially at crisp edges.
- Clean brushes immediately after use with warm water and soap for latex paint. A brush that dries with paint in it is ruined.
- Store leftover paint correctly. Wipe the rim clean, seal tightly, store upside down for 30 seconds then right-side up — this creates an airtight seal with the paint itself. Stored properly in a temperature-stable location, latex paint lasts 2–10 years for touch-ups.
- Do a final inspection under raking light before declaring the job done. Walk the room with a bright work light held at a low angle to the wall — this reveals any drips, roller texture inconsistencies, or missed spots that are invisible under overhead lighting.

Leave a Reply